Table of Contents
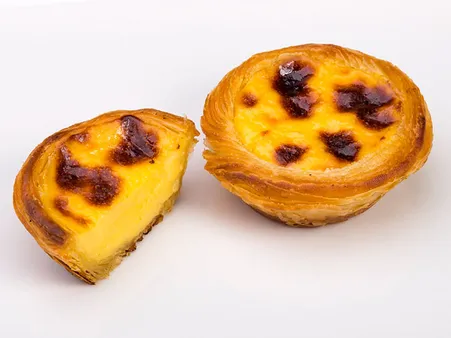
Welcome to tauhuichiban, where we share the joy of cooking and baking with our readers. Today, we're excited to bring you an authentic portuguese pastel de nata recipe that will transport your taste buds straight to Lisbon. These creamy custard tarts are a beloved treat in Portugal and around the world. With our step-by-step instructions and helpful tips, you'll be able to recreate this delightful dessert in your own kitchen.
Key Takeaways | |
|---|---|
Ingredients: | - Puff pastry dough - Egg yolks - Granulated sugar - Whole milk - Heavy cream - Vanilla extract - Lemon zest (optional) |
Tools: | - Ovenproof cups or molds - Mixing bowls - Whisk or electric mixer - Saucepan or pot - Measuring cups & spoons |
Unlock The Magic: Portuguese Pastel De Nata Recipe
Making the Perfect Pastéis de Nata: A Fun Adventure
Unleash Your Inner Pastry Chef
Making pastéis de nata might seem a little daunting at first, but trust me, it's an adventure worth taking! It's like building a delicious tower with flaky layers and a secret creamy center. Don't worry, we'll guide you through every step, and you'll be amazed at what you can create.
From Grocery Store to Golden Treats
First things first, let's gather our ingredients. Think of it as gathering your tools for a treasure hunt! We'll need things like puff pastry (the magic carpet for our custard), eggs, sugar (for sweetness, of course!), milk, and a few other goodies to make our natas extra special. We'll even use a bit of fire (from the oven, of course!) to transform these simple ingredients into golden, crispy treats. Ready to begin our Portuguese baking adventure? Let's go!
Ingredient | Quantity |
|---|---|
Puff Pastry | 1 package (14.1 ounces/ 400 grams) |
Large egg yolks | 6 |
Granulated sugar | 1 cup (200 grams) |
Whole milk | 1 1/4 cups (300 ml) |
Heavy cream | 1/2 cup (120 ml) |
All-purpose flour (for dusting) | As needed |
Making the Perfect Pastéis de Nata: A Fun Adventure
Ingredients and Tools You'll Need for Your Portuguese Pastel de Nata Recipe
Imagine this: you're a master builder, but instead of bricks and mortar, you're using the most delicious ingredients to craft the perfect Portuguese pastel de nata. First, you'll need your "bricks" - a package of puff pastry. This will be the flaky, golden foundation of your natas. Next, you'll need your "mortar" - a mix of egg yolks, sugar, milk, and heavy cream. This luscious custard will be the heart of your creation. Don't forget a pinch of flour for dusting and you're ready to build!
Ingredients and Tools You'll Need for Your Portuguese Pastel de Nata Recipe
Step-by-Step Guide to Crafting Your Own Delicious Pastéis de Nata at Home
Rolling Out the Magic Carpet
First, let's roll out our puff pastry like a magic carpet. Imagine you're a pastry wizard, and your wand is a rolling pin! Dust some flour on your work surface to prevent sticking. Then, gently roll out the puff pastry into a large rectangle. Fold it in half and roll it out again. This folding helps create those flaky layers we love in pastéis de nata. Do this three times for the best results – it's like weaving a spell!
Shaping Our Golden Cups
Next, we need to shape our puff pastry into little cups that will hold our creamy custard. Cut circles from the rolled-out dough using a round cookie cutter or even the top of a glass if you don't have one handy. Press these circles into small ovenproof cups or molds, making sure they go up the sides and are nice and snug – think of them as cozy nests waiting for their eggy filling.
Tips for Shaping Pastry Cups | |
|---|---|
- Use enough pressure to ensure dough sticks to mold. | - Trim excess dough around edges with knife or scissors. |
- Make sure bottom is thin but not too fragile. | - Chill cups in fridge before filling for better structure. |

Step-by-Step Guide to Crafting Your Own Delicious Pastéis de Nata at Home
Final Thought
We hope you enjoyed learning how to make Portuguese pastel de nata with us today. By following our detailed recipe and tips, you can now enjoy these scrumptious treats anytime you crave them. Remember that practice makes perfect, so don't be discouraged if your first attempt doesn't turn out flawless – keep experimenting until you achieve that perfect balance of crispy pastry and creamy filling.